Mastering React Native Upgrades: A Guide for Large-scale Companies

Building Great Apps with React Native
Introduction
My journey with React Native began around version 0.21, and at that time, new versions were released almost bi-weekly. Frequent releases meant that I had to adapt quickly, upgrade often, and deal with occasional breaking changes. However, the current state of React Native is much more stable, with a 2-3 month release cycle. This allows for better preparation, and with modern tools available today, the process can go smoothly.
In my first few years of experience with React Native upgrades, while working at small startups, I didn't often think about the process, as it was usually a one-person job. However, when I joined a large company such as Shopee (the top e-commerce enterprise in Southeast Asia), I encountered a significant difference and faced greater challenges.
Challenges faced during the upgrade process
Imagine almost 100 developers working on the same React Native codebase, along with over 30 React Native plugin teams whose codebases were housed in external repositories. Operating on a weekly release schedule, it was not feasible to pause feature releases in favor of a React Native upgrade. This situation proved to be far more challenging than a one-person job.
Guide Overview
Here's my guide to React Native Upgrade, which I've learned from past experiences and has been proven to work for small startups, mid-sized companies, and even large enterprises.

Preparation Before Development
There are plenty of preparations that can be done before development. Here's a brief overview, and we'll dive into the details one by one.
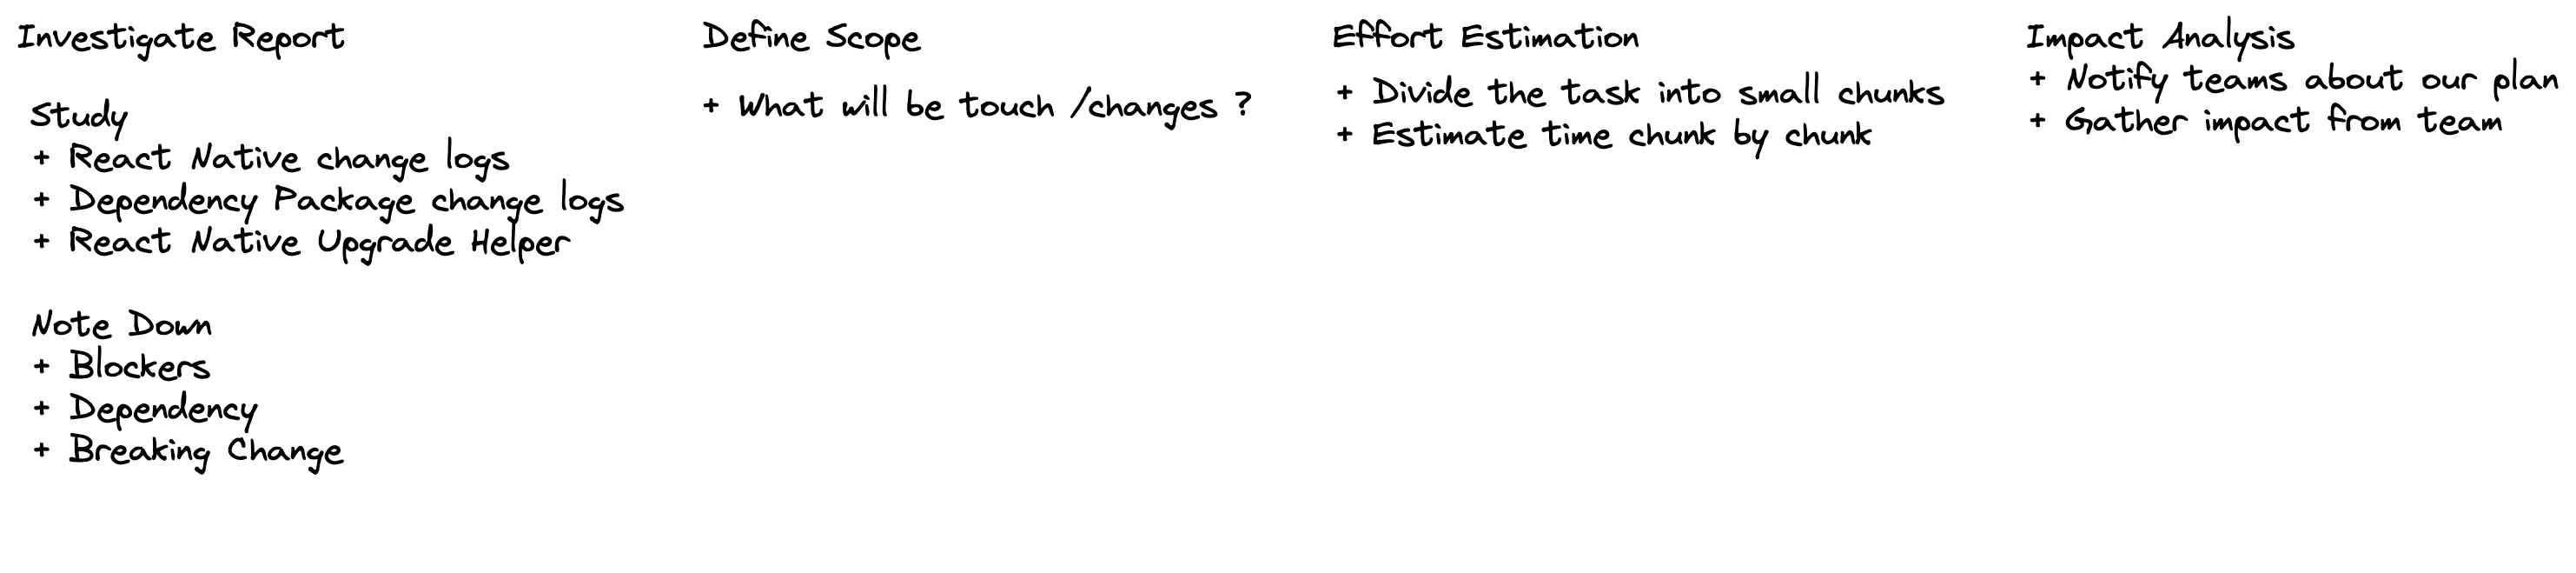
Investigate Reports
In the investigation report, it is essential to study React Native change logs, dependency package change logs, and the React Native Upgrade Helper. This comprehensive analysis will help you identify potential blockers, dependencies, and breaking changes that may affect the upgrade process. By noting these factors in the report, you can better prepare for a successful React Native upgrade and mitigate any risks or challenges that may arise during the process. If your team has the resources, you can create reports by version. Tasks can also be assigned in parallel.
Define Scope
In this step, you'll need to consider what will be affected or altered. Although the React Native upgrade may provide numerous appealing features, your responsibility is to determine what should be prioritized.
Effort Estimation
To effectively estimate the effort required for a project, break the task into smaller, manageable chunks. Then, estimate the time needed for each chunk, keeping in mind the resources available and the scope of the project. Prioritize tasks based on the features offered by the React Native upgrade and the overall impact on the project.
Impact Analysis
During the impact analysis phase, it is crucial to communicate the upgrade plan to all relevant teams and gather their input on potential effects. This collaborative approach helps identify any concerns or dependencies that may arise during the upgrade process, allowing for better planning and risk mitigation. By involving all stakeholders in the impact analysis, the team can ensure a smoother transition and minimize disruptions to ongoing projects and workflows.
Development
Code Change
If you have followed the above process, by now you should have the investigation reports and the feedback from the impact analysis. This information should be sufficient to initiate development, allowing you to create a comprehensive upgrade plan based on the aspects of the codebase you will be modifying. If the workload is too extensive for one person, assembling a dedicated upgrade team can help speed things up.
During the code change, you can leverage code mods and automated tools to reduce manual alterations. Be sure to ensure proper version control and branching strategies along the way. At this stage, you might find yourself migrating to alternative libraries or APIs. Sometimes, you might need to patch a package, and that isn't a bad thing to do, as everything has a trade-off. If it speeds up the process with less effort, why not?
The Unexpected
You've likely heard developers complain about upgrading React Native, as sometimes unintended issues arise. If everything goes smoothly, then that's great. However, it's wise to add some buffer time to your schedule, as there's a high chance you'll encounter unexpected challenges.
Testing & Release
Conduct Unit and Integration Testing
After completing the code changes, the simplest way to ensure you don't unintentionally break anything is to run unit tests and integration tests that the codebase may have. If everything works on the first run, consider it a lucky day. However, if it doesn't, investigate the reasons behind the failures.
Regression test
In my experience, conducting a group testing session with developer representatives from each team helps to reduce the burden and makes the process smoother. Especially since feature developers might not be fully aware of the details of the code changes, involving them in earlier phases could be beneficial.
QA test
When you reach this stage, your React Native application should not have too many underlying issues. Once you pass QA testing, the next steps depend on your company's workflows. For some, this might be the final step, while for others it may involve performance testing and user acceptance testing. After going through all the testing, you should have high confidence in releasing the application.
Release
If your release team already has a phased deployment strategy in place, make sure to follow the guidelines. Depending on the React Native version update, opting for a phased deployment is always recommended to ensure increased safety.
After the initial phased release, continue monitoring and addressing potential post-upgrade issues. As everything appears to be in good order, proceed with rolling out the deployment.
Conclusion
In summary, excelling in React Native upgrades is essential for keeping a competitive advantage and preserving your app's lifespan. By adopting best practices and diligently preparing for each upgrade, you can create a future-proof application that stands the test of time. Key takeaways from this article include the importance of thorough preparation, effective communication, and diligent testing to ensure a successful and seamless upgrade process. Embrace these strategies and watch your React Native application thrive.
Thank you for reading this far. If you found this article helpful or learned something new, please consider showing your support by liking it and following me for updates on future posts. Stay tuned!